Java Compilation and Execution Flow Explained
Java Compilation & Execution Flow
Understanding the Java compilation and execution flow is critical to truly understanding how Java works internally. Many beginners can write Java code, but they do not clearly understand what happens from the moment a .java file is written to the moment the program produces output. Java follows a multi-step execution process, which is very different from traditional languages like C or C++.
This post explains the complete Java compilation and execution flow step by step, including the role of the compiler, bytecode, JVM, and runtime components.
Why Java Uses a Two-Step Execution Model
Java does not execute source code directly. Instead, it follows a compile-once, run-anywhere approach.
The goals behind this design are:
- Platform independence
- Strong security
- Better error detection
- Optimized runtime performance
To achieve this, Java separates compilation and execution into different phases.
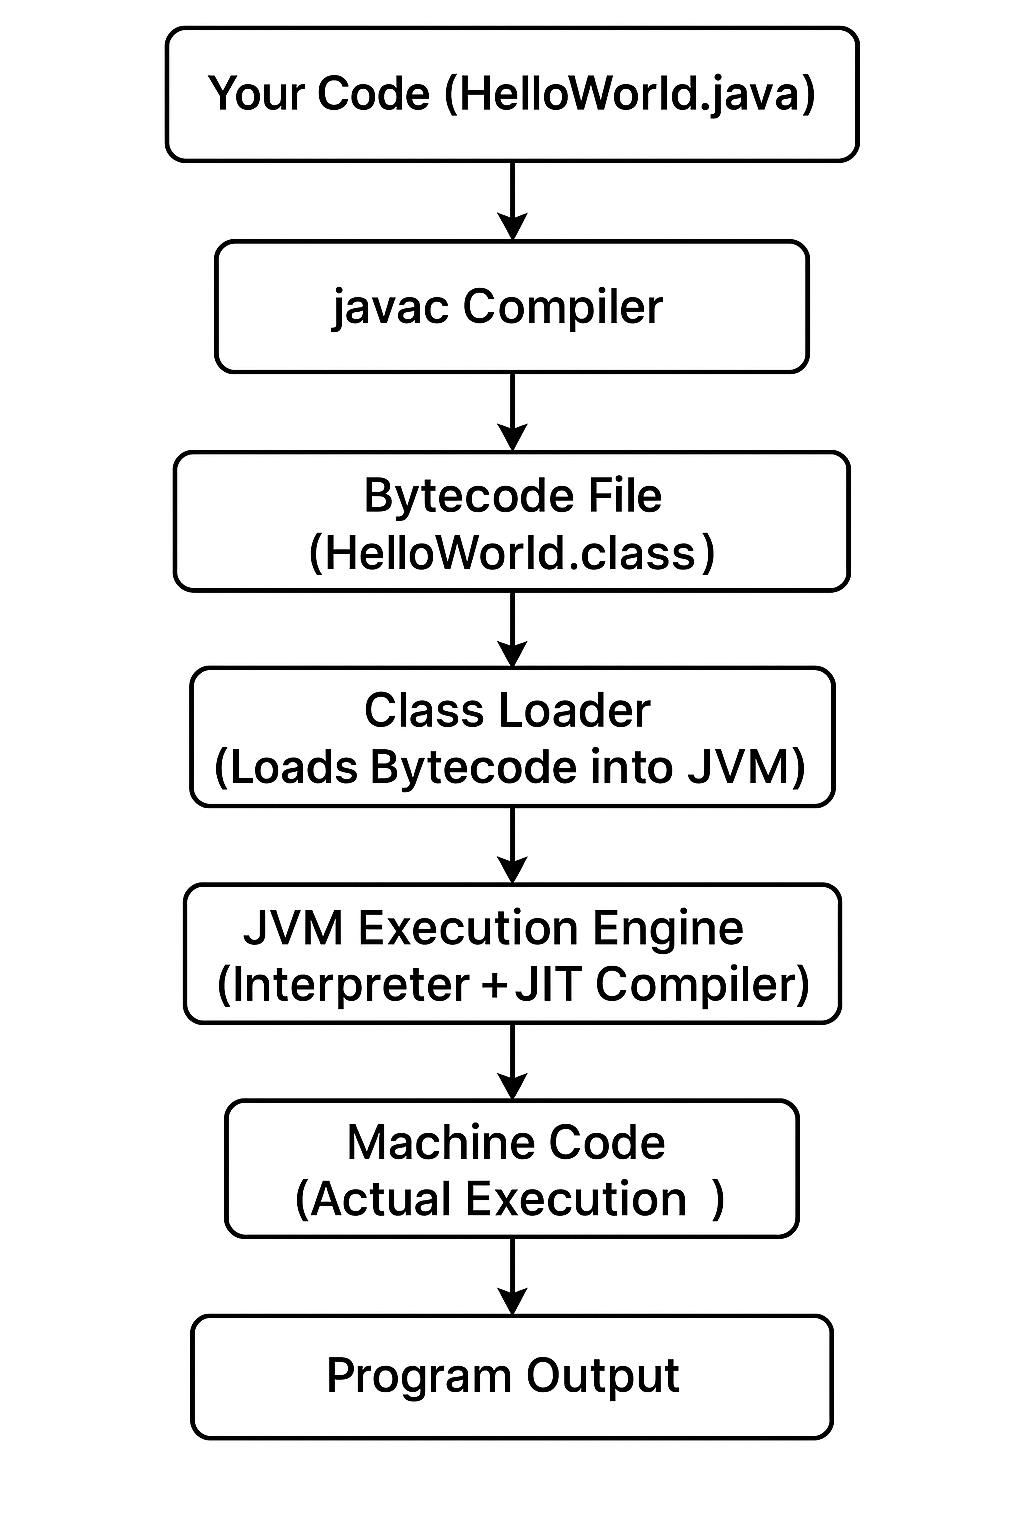
Step 1: Writing Java Source Code
The process begins when a developer writes Java source code in a file with a .java extension.
Example:
class Demo {
    public static void main(String[] args) {
        System.out.println("Java Execution Flow");
    }
}
At this stage:
- The code is human-readable
- It follows Java syntax rules
- It cannot be executed directly by the system
Step 2: Compilation Using javac
Java source code is compiled using the Java compiler (javac), which is part of the JDK.
Command:
javac Demo.java
What the compiler does
- Checks syntax errors
- Verifies structure rules
- Converts source code into bytecode
- Generates a
.classfile
The output file:
Demo.class
This .class file does not contain machine code. It contains platform-independent bytecode.
Step 3: Bytecode – The Key to Platform Independence
Bytecode is an intermediate representation of Java code.
Important properties of bytecode:
- Not tied to any operating system
- Same
.classfile runs everywhere - Designed specifically for JVM execution
Because of bytecode:
- Java programs can run on Windows, Linux, macOS
- No recompilation is required for different platforms
This is the foundation of Java’s Write Once, Run Anywhere principle.
Step 4: Class Loading by JVM
When a Java program is executed, the JVM starts its work.
Command:
java Demo
The JVM first loads the .class file using the Class Loader subsystem.
Types of class loaders
- Bootstrap Class Loader
- Extension Class Loader
- Application Class Loader
Their job is to:
- Locate required class files
- Load them into memory
- Avoid duplicate class loading
Step 5: Bytecode Verification
Before execution, the JVM verifies bytecode to ensure safety.
Verification checks:
- No illegal memory access
- No stack overflow risks
- No unauthorized data access
- Correct data types usage
If verification fails, the program is stopped immediately.
This step makes Java secure by default.
Step 6: Runtime Memory Allocation
Once verified, the JVM allocates memory for program execution.
Main memory areas include:
- Method Area
- Heap
- Stack
- Program Counter Register
- Native Method Stack
Each thread gets its own stack, while objects are stored in the heap.
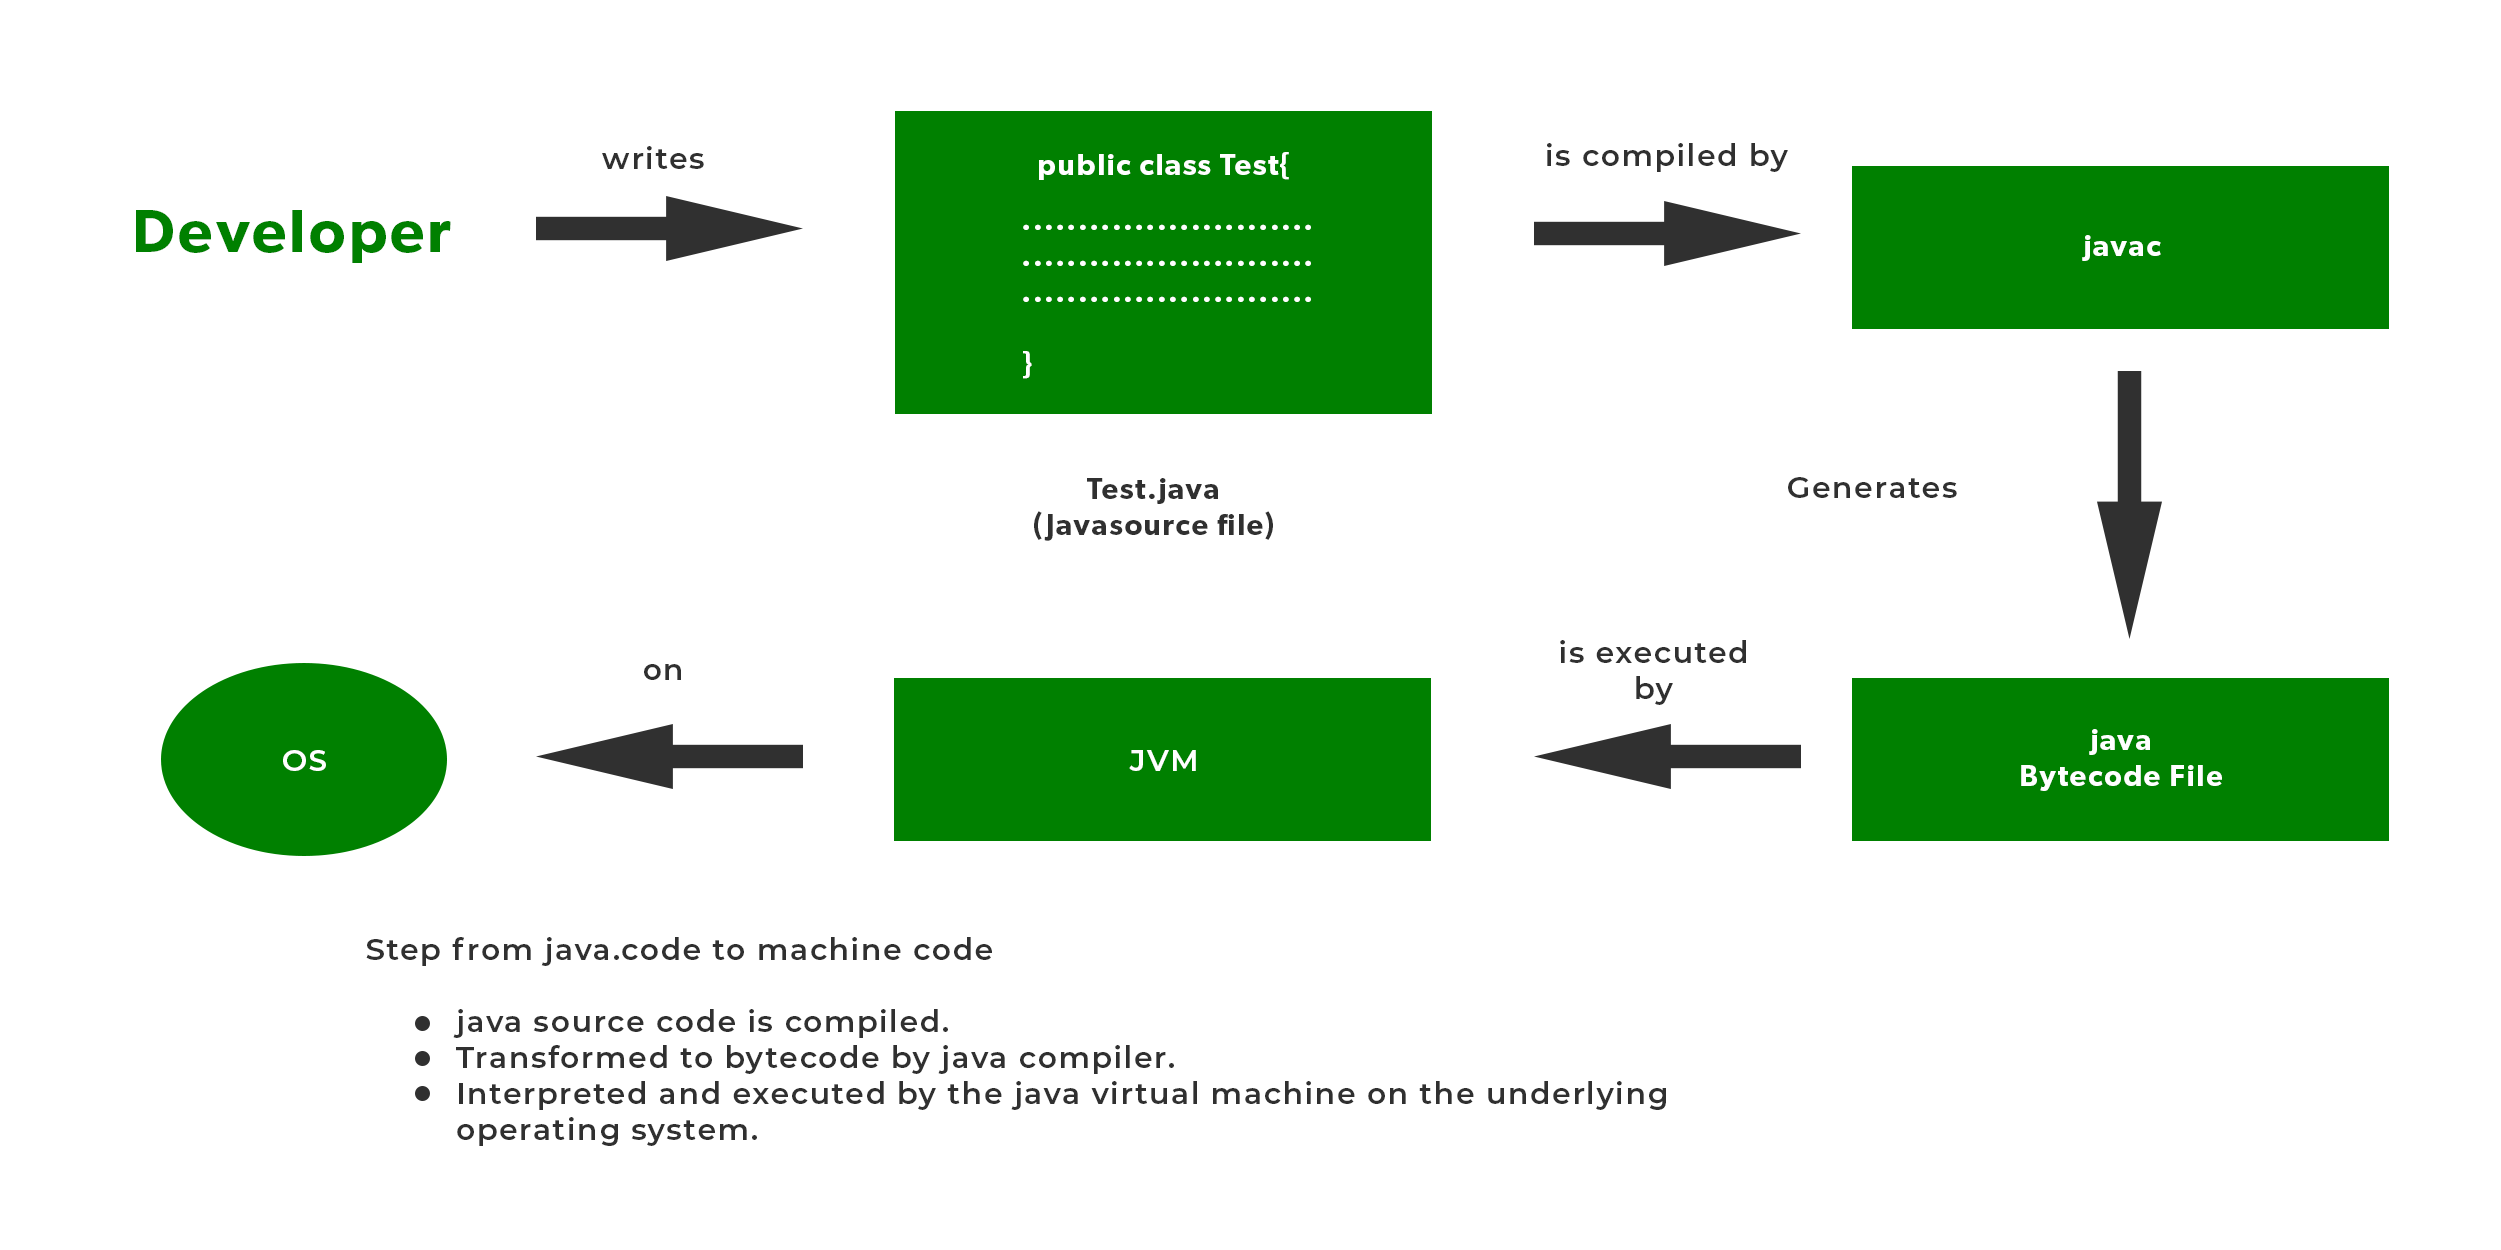
Step 7: Execution by the JVM
The Execution Engine of the JVM runs the bytecode.
It uses two mechanisms:
- Interpreter (executes bytecode line by line)
- Just-In-Time (JIT) Compiler (converts bytecode to native machine code)
Frequently executed code is optimized and compiled into native instructions for better performance.
This is why Java programs become faster over time during execution.
Step 8: Garbage Collection During Execution
While the program runs, the JVM automatically manages memory.
Garbage Collector:
- Identifies unused objects
- Frees memory
- Prevents memory leaks
Developers do not manually free memory in Java.
Step 9: Program Termination
When:
- The
mainmethod completes - All non-daemon threads finish
The JVM:
- Releases memory
- Stops execution
- Terminates the program cleanly
Complete Java Compilation & Execution Flow (Summary)
- Write
.javasource file - Compile using
javac - Generate
.classbytecode - JVM loads class
- Bytecode is verified
- Memory is allocated
- Bytecode is executed
- Garbage collection occurs
- Program terminates
This flow is consistent across all platforms.
Common Beginner Confusions
Java is interpreted or compiled?
Java is both compiled and interpreted.
Why not compile directly to machine code?
To maintain platform independence.
Why JVM is needed?
To execute bytecode, manage memory, and ensure security.
Why This Flow Matters in Real Projects
Understanding compilation and execution helps with:
- Debugging runtime issues
- Performance optimization
- Memory management awareness
- Deployment troubleshooting
This knowledge is essential for backend developers and automation engineers.
Conclusion
Java follows a unique and powerful compilation and execution model. Source code is first compiled into platform-independent bytecode, then executed by the JVM using advanced runtime optimizations. This design provides portability, security, and performance. Understanding the Java compilation and execution flow builds a strong conceptual foundation and helps developers write efficient and reliable Java applications.